(→Trivia) |
No edit summary |
||
| (41 intermediate revisions by 5 users not shown) | |||
| Line 42: | Line 42: | ||
In the small town of [[Pitts Landing]], [[Greg Banks]] is in his English class and is called upon by his English teacher, [[Mr. Saur]], to give a report about what he did during the summer. Mr. Saur is a strict teacher who never laughs and is referred to as "Sour Ball" by Greg and his friends. Greg describes what happened to him [[Say Cheese and Die!#Plot|last summer]] with [[The Camera|the evil camera]], but Mr. Saur believes the story is false and gives Greg an "F" on the assignment. Greg insists his story is true, so Mr. Saur challenges Greg to present the camera. Greg's parents won't let him visit his cousins in the summer if he flunks his report, so he's desperate to prove his story's validity. |
In the small town of [[Pitts Landing]], [[Greg Banks]] is in his English class and is called upon by his English teacher, [[Mr. Saur]], to give a report about what he did during the summer. Mr. Saur is a strict teacher who never laughs and is referred to as "Sour Ball" by Greg and his friends. Greg describes what happened to him [[Say Cheese and Die!#Plot|last summer]] with [[The Camera|the evil camera]], but Mr. Saur believes the story is false and gives Greg an "F" on the assignment. Greg insists his story is true, so Mr. Saur challenges Greg to present the camera. Greg's parents won't let him visit his cousins in the summer if he flunks his report, so he's desperate to prove his story's validity. |
||
| − | Greg then plans to revisit the Coffman House to retrieve the camera. He discusses this over lunch with his friends, [[Doug Arthur|Doug]], Michael and [[Shari Walker|Shari]], who are shocked at his decision and try to discourage him, as the camera had done so many evil/bad things to them last summer. But when Greg's English classmates named Donny and Brian, mocked him in public by pretending to take photographs with their hands and quipping "Say cheese and die!", Greg becomes all the more determined to find the camera and prove his story are true. |
+ | Greg then plans to revisit the Coffman House to retrieve the camera. He discusses this over lunch with his friends, [[Doug Arthur|Doug]], [[Michael Warner|Michael]] and [[Shari Walker|Shari]], who are shocked at his decision and try to discourage him, as the camera had done so many evil/bad things to them last summer. But when Greg's English classmates named Donny and Brian, mocked him in public by pretending to take photographs with their hands and quipping "Say cheese and die!", Greg becomes all the more determined to find the camera and prove his story are true. |
Later that night, Greg returns to the Coffman House, only to discover that it has been purchased by a new owner who has had the place cleared out. While Greg is searching for the camera in the debris, a boy named Jonathan catches him, taking him for a thief. He soon realizes that this is not the case. Greg learns that Jonathan is the son of the new owner of the Coffman house. Greg finally finds the camera under a raccoon's dead body/corpse, and Jonathan becomes curious as to why he is so interested in it. Greg says that he must show it to his English class, but Jonathan becomes interested in keeping the camera, arguing that it is technically his since it was originally in his new house. While fighting for the camera, Greg accidentally snaps Jon's picture. The photograph then shows a long carpenter nail through Jon's foot. Jon thinks that the camera is a joke and Greg asks if he can borrow it for a while. Jonathan then runs off to find his father, only to step on a carpenter nail, as predicted in the photograph, and then is rushed to the hospital after that. |
Later that night, Greg returns to the Coffman House, only to discover that it has been purchased by a new owner who has had the place cleared out. While Greg is searching for the camera in the debris, a boy named Jonathan catches him, taking him for a thief. He soon realizes that this is not the case. Greg learns that Jonathan is the son of the new owner of the Coffman house. Greg finally finds the camera under a raccoon's dead body/corpse, and Jonathan becomes curious as to why he is so interested in it. Greg says that he must show it to his English class, but Jonathan becomes interested in keeping the camera, arguing that it is technically his since it was originally in his new house. While fighting for the camera, Greg accidentally snaps Jon's picture. The photograph then shows a long carpenter nail through Jon's foot. Jon thinks that the camera is a joke and Greg asks if he can borrow it for a while. Jonathan then runs off to find his father, only to step on a carpenter nail, as predicted in the photograph, and then is rushed to the hospital after that. |
||
| Line 48: | Line 48: | ||
The next day, Greg goes to school and is caught by Shari on the way. Greg tries to hide the camera from Shari unsuccessfully. They have an argument about Greg bringing the camera to school. This results in Greg accidentally snapping a picture of Shari, while they fight for the camera. The picture then develops and appears to be a negative, leading the two to believe that the camera is broken. Shari then grabs the camera and takes a picture of Greg, which then develops into a picture of Greg appearing to look like an obese person. Greg then goes to English class, excited to show Mr. Saur his camera as proof for his assignment. He is welcomed by Mr. Saur's substitute, which makes him upset. He then decides to put the camera in his locker; however, he is caught by Donny and Brian after exiting the classroom. They torment him with the camera; however, are stopped by the principal. The next morning, Greg wakes up to find himself fatter in his pajamas. His mother disagrees, saying that his pajamas are always too tight for him. Greg finds out in school that Shari has lost weight. Over the following days, Shari loses more weight while Greg gains more. |
The next day, Greg goes to school and is caught by Shari on the way. Greg tries to hide the camera from Shari unsuccessfully. They have an argument about Greg bringing the camera to school. This results in Greg accidentally snapping a picture of Shari, while they fight for the camera. The picture then develops and appears to be a negative, leading the two to believe that the camera is broken. Shari then grabs the camera and takes a picture of Greg, which then develops into a picture of Greg appearing to look like an obese person. Greg then goes to English class, excited to show Mr. Saur his camera as proof for his assignment. He is welcomed by Mr. Saur's substitute, which makes him upset. He then decides to put the camera in his locker; however, he is caught by Donny and Brian after exiting the classroom. They torment him with the camera; however, are stopped by the principal. The next morning, Greg wakes up to find himself fatter in his pajamas. His mother disagrees, saying that his pajamas are always too tight for him. Greg finds out in school that Shari has lost weight. Over the following days, Shari loses more weight while Greg gains more. |
||
| − | Mr. Saur arrives the following day and Greg shows him the camera which he ignores. He then makes his final decision, which is to give Greg a failing mark. Greg's parents insist that his weight gain is the result of some allergic reaction to something he ate. Shari and Greg, desperate for a solution, realize that if they make Greg's photo negative, there might be a chance of returning to their normal bodies. They rush to a photo shop where Greg's brother Terry works. They find him and plead with him to reverse their pictures. Greg offers him all of his allowance, which his brother accepts. His brother then reverses the pictures and the following day, Greg and Shari return to their normal bodies. |
+ | Mr. Saur arrives the following day and Greg shows him the camera which he ignores. He then makes his final decision, which is to give Greg a failing mark. Greg's parents insist that his weight gain is the result of some allergic reaction to something he ate. Shari and Greg, desperate for a solution, realize that if they make Greg's photo negative, there might be a chance of returning to their normal bodies. They rush to a photo shop where Greg's brother [[Terry Banks|Terry]] works. They find him and plead with him to reverse their pictures. Greg offers him all of his allowance, which his brother accepts. His brother then reverses the pictures and the following day, Greg and Shari return to their normal bodies. |
Against Shari's advice, Greg brings the camera to school and again insists to Mr. Saur to give him a passing mark for his assignment, offering to demonstrate the camera's powers. Mr. Saur takes the camera and insists on taking a picture of Greg with his entire class. He then snaps the photo. It is unknown what happens to Greg and the rest of the class at the end of the book. |
Against Shari's advice, Greg brings the camera to school and again insists to Mr. Saur to give him a passing mark for his assignment, offering to demonstrate the camera's powers. Mr. Saur takes the camera and insists on taking a picture of Greg with his entire class. He then snaps the photo. It is unknown what happens to Greg and the rest of the class at the end of the book. |
||
| Line 80: | Line 80: | ||
<gallery bordercolor="#007a00" hideaddbutton="true"> |
<gallery bordercolor="#007a00" hideaddbutton="true"> |
||
saycheeseandie-again-uk.jpg|UK |
saycheeseandie-again-uk.jpg|UK |
||
| − | saycheeseanddie-again-italian.jpg|Italian ( |
+ | saycheeseanddie-again-italian.jpg|Italian (''Foto Dal Futuro Vol. 2'' - Photos From The Future No. 2) |
| − | saycheeseanddie-again-spanish.jpg|Spanish ( |
+ | saycheeseanddie-again-spanish.jpg|Spanish (''La Otra Sonrisa de la Muerte'' - The Other Photos Of Death) |
| − | Saycheeseanddie-again!-german.jpg|German ( |
+ | Saycheeseanddie-again!-german.jpg|German (''Bitte Lächeln'' Please Smile!) |
| − | Saycheeseandie-again!-danish.jpg|Danish ( |
+ | Saycheeseandie-again!-danish.jpg|Danish (''Smil, du er Død'' Smile, You're Dead!) |
| + | Say_Cheese_and_Die_Again_Swedish.jpg|Swedish (''Det Onda Ögat - Igen!'' - The Evil Eye - Again!) |
||
| ⚫ | |||
| − | Saycheeseanddie-again!- |
+ | Saycheeseanddie-again!-french1.jpg|French (Ver. 1) (''Photos De Malheur'' Pictures Of Misfortune) |
| − | Saycheeseanddie-again!- |
+ | Saycheeseanddie-again!-french2.jpg|French (Ver. 2) (''Photos De Malheur'' Pictures Of Misfortune) |
| ⚫ | |||
| − | saycheeseanddie-again!-brazilian.jpg|Brazilian ( |
+ | saycheeseanddie-again!-brazilian.jpg|Brazilian (''Sorria E Morra... Outra Vez!'' - Smile and Die... Again!) |
| + | SCADA Escalofrios.jpg|Mexican (''Sonrie Y Muerte... Otra Vez!'' - Smile and Death... Again!) (Reprint) |
||
| + | Picoli Brividi Scatti Mortali.jpg|Italian (Compilation with ''[[Say Cheese and Die!]]'' and ''[[The Cuckoo Clock of Doom]]'') |
||
</gallery> |
</gallery> |
||
|} |
|} |
||
==Merchandise== |
==Merchandise== |
||
| − | *Most of the 90s merch for ''Say Cheese and Die - Again!'' censored the word "Die" |
+ | *Most of the 90s merch for ''Say Cheese and Die - Again!'' censored the word "Die". Mostly for apparel. |
<gallery bordercolor="#007a00" hideaddbutton="true"> |
<gallery bordercolor="#007a00" hideaddbutton="true"> |
||
SayCheeseandDieAPuzzle.jpg|Puzzle |
SayCheeseandDieAPuzzle.jpg|Puzzle |
||
SCADA Sweater.png|Sweatshirt |
SCADA Sweater.png|Sweatshirt |
||
| + | 44 Say Cheese and Die Again sweatshirt front.jpg|Sweatshirt |
||
40516945_1940340609412918_7405520961249738752_n.jpg|T-shirt |
40516945_1940340609412918_7405520961249738752_n.jpg|T-shirt |
||
</gallery> |
</gallery> |
||
| Line 104: | Line 108: | ||
<gallery position="left" hideaddbutton="true" spacing="small" widths="200" bordercolor="transparent" orientation="none" columns="4" captionalign="center" bordersize="none" navigation="true"> |
<gallery position="left" hideaddbutton="true" spacing="small" widths="200" bordercolor="transparent" orientation="none" columns="4" captionalign="center" bordersize="none" navigation="true"> |
||
Goosebumpswiki-tvepisode-button2.png|[[:Say Cheese and Die — Again!/TV_Episode|Click here for a full article about the television adaptation.]]|link=:Say Cheese and Die — Again!/TV_Episode |
Goosebumpswiki-tvepisode-button2.png|[[:Say Cheese and Die — Again!/TV_Episode|Click here for a full article about the television adaptation.]]|link=:Say Cheese and Die — Again!/TV_Episode |
||
| + | </gallery> |
||
| + | |||
| + | ==Advertisement== |
||
| + | <gallery widths="235" bordercolor="transparent" spacing="small" hideaddbutton="true"> |
||
| + | OS 44 Say Cheese and Die Again bookad from OS43.jpg|Book advertisement from ''[[The Beast from the East]]''. |
||
</gallery> |
</gallery> |
||
| Line 109: | Line 118: | ||
<gallery widths="235" bordercolor="transparent" spacing="small" hideaddbutton="true"> |
<gallery widths="235" bordercolor="transparent" spacing="small" hideaddbutton="true"> |
||
Say Cheese and Die — Again! - artwork.jpg|Original 1996 artwork by [[Tim Jacobus]]. |
Say Cheese and Die — Again! - artwork.jpg|Original 1996 artwork by [[Tim Jacobus]]. |
||
| + | </gallery> |
||
| + | |||
| + | ==Tear-Outs== |
||
| + | The original printings of the book included bookmark and trading card [[Goosebumps (original series)/Tear-outs|tear-outs]]. |
||
| + | <gallery> |
||
| + | Goosebumps 44 Say Cheese and Die Again trading card front and back.jpg|#44 trading card found in this book. |
||
</gallery> |
</gallery> |
||
==Trivia== |
==Trivia== |
||
| − | *''Say Cheese and Die — Again!'' has the longest time difference between installments of any sequel in the original series at 3 years & 7 months |
+ | *''Say Cheese and Die — Again!'' has the longest time difference between installments of any sequel in the original series at 3 years & 7 months, as well as by forty books. |
*Unlike the previous book, ''Say Cheese and Die!'', which was told in the third person narrative, ''Say Cheese and Die — Again!'' is told from Greg's point of view. |
*Unlike the previous book, ''Say Cheese and Die!'', which was told in the third person narrative, ''Say Cheese and Die — Again!'' is told from Greg's point of view. |
||
*It is never revealed what happened to the two bullies, Joey and Mickey, who found the camera and used it at the end of the previous book. |
*It is never revealed what happened to the two bullies, Joey and Mickey, who found the camera and used it at the end of the previous book. |
||
| − | *Although Greg's age is not given in the previous book, the sequel indirectly reveals that he is |
+ | *Although Greg's age is not given in the previous book, the sequel indirectly reveals that he is 12 years old. Greg mentions that his 16-year-old brother, Terry, is four years older than he is. |
*This is the final appearances of Greg and his friends to date. |
*This is the final appearances of Greg and his friends to date. |
||
| + | *This is the last book in the ''Say Cheese and Die'' saga to be set in [[Pitts Landing]]. |
||
*Greg claims the events of the first book happened last summer, even though it actually took place in the fall. |
*Greg claims the events of the first book happened last summer, even though it actually took place in the fall. |
||
| − | *One of the skeleton kids on the cover is wearing a shirt |
+ | *One of the skeleton kids on the cover is wearing a shirt with a design closely resembling the logo for [[wikipedia:Grateful_Dead|The Grateful Dead]] |
| + | *The 2018 eBook removes any mention of Greg referring to Donny and Brian as "Sumo-1 and Sumo-2". |
||
| + | *This is the final book to use "Coming Soon/Also Available From R.L. Stine" on the advertisement for the next book on the back cover. |
||
===References in other ''Goosebumps'' media=== |
===References in other ''Goosebumps'' media=== |
||
* In ''[[Goosebumps: The Game]]'', there is an in-game achievement named "Say Cheese--Again!", which can be earned by taking pictures of all the monsters with the haunted camera. |
* In ''[[Goosebumps: The Game]]'', there is an in-game achievement named "Say Cheese--Again!", which can be earned by taking pictures of all the monsters with the haunted camera. |
||
| Line 134: | Line 152: | ||
[[Category:Covers by Tim Jacobus]] |
[[Category:Covers by Tim Jacobus]] |
||
[[Category:Magic]] |
[[Category:Magic]] |
||
| + | [[Category:Teachers]] |
||
| + | [[Category:Cousins]] |
||
Revision as of 02:40, 7 September 2019
Say Cheese and Die — Again! is the forty-fourth book in the original Goosebumps book series, a sequel to Say Cheese and Die!, and the second book in the Say Cheese and Die! saga. It was first published in 1996.
The cover illustration depicts a photograph of a skeleton family having dinner.
Blurb
PICTURE-PERFECT NIGHTMARE!
Sourball. That's what Greg calls his English teacher, Mr. Saur. He's a real grouch. And now he just gave Greg a big fat "F" on his oral report. He didn't believe Greg's story. About the camera Greg found last summer. About the pictures it took. About the evil things that happened. Poor Greg. He just wanted to prove old Sourball wrong. But now that he's dug up the camera, bad things are happening. Really bad things. Just like the first time...
Plot
In the small town of Pitts Landing, Greg Banks is in his English class and is called upon by his English teacher, Mr. Saur, to give a report about what he did during the summer. Mr. Saur is a strict teacher who never laughs and is referred to as "Sour Ball" by Greg and his friends. Greg describes what happened to him last summer with the evil camera, but Mr. Saur believes the story is false and gives Greg an "F" on the assignment. Greg insists his story is true, so Mr. Saur challenges Greg to present the camera. Greg's parents won't let him visit his cousins in the summer if he flunks his report, so he's desperate to prove his story's validity.
Greg then plans to revisit the Coffman House to retrieve the camera. He discusses this over lunch with his friends, Doug, Michael and Shari, who are shocked at his decision and try to discourage him, as the camera had done so many evil/bad things to them last summer. But when Greg's English classmates named Donny and Brian, mocked him in public by pretending to take photographs with their hands and quipping "Say cheese and die!", Greg becomes all the more determined to find the camera and prove his story are true.
Later that night, Greg returns to the Coffman House, only to discover that it has been purchased by a new owner who has had the place cleared out. While Greg is searching for the camera in the debris, a boy named Jonathan catches him, taking him for a thief. He soon realizes that this is not the case. Greg learns that Jonathan is the son of the new owner of the Coffman house. Greg finally finds the camera under a raccoon's dead body/corpse, and Jonathan becomes curious as to why he is so interested in it. Greg says that he must show it to his English class, but Jonathan becomes interested in keeping the camera, arguing that it is technically his since it was originally in his new house. While fighting for the camera, Greg accidentally snaps Jon's picture. The photograph then shows a long carpenter nail through Jon's foot. Jon thinks that the camera is a joke and Greg asks if he can borrow it for a while. Jonathan then runs off to find his father, only to step on a carpenter nail, as predicted in the photograph, and then is rushed to the hospital after that.
The next day, Greg goes to school and is caught by Shari on the way. Greg tries to hide the camera from Shari unsuccessfully. They have an argument about Greg bringing the camera to school. This results in Greg accidentally snapping a picture of Shari, while they fight for the camera. The picture then develops and appears to be a negative, leading the two to believe that the camera is broken. Shari then grabs the camera and takes a picture of Greg, which then develops into a picture of Greg appearing to look like an obese person. Greg then goes to English class, excited to show Mr. Saur his camera as proof for his assignment. He is welcomed by Mr. Saur's substitute, which makes him upset. He then decides to put the camera in his locker; however, he is caught by Donny and Brian after exiting the classroom. They torment him with the camera; however, are stopped by the principal. The next morning, Greg wakes up to find himself fatter in his pajamas. His mother disagrees, saying that his pajamas are always too tight for him. Greg finds out in school that Shari has lost weight. Over the following days, Shari loses more weight while Greg gains more.
Mr. Saur arrives the following day and Greg shows him the camera which he ignores. He then makes his final decision, which is to give Greg a failing mark. Greg's parents insist that his weight gain is the result of some allergic reaction to something he ate. Shari and Greg, desperate for a solution, realize that if they make Greg's photo negative, there might be a chance of returning to their normal bodies. They rush to a photo shop where Greg's brother Terry works. They find him and plead with him to reverse their pictures. Greg offers him all of his allowance, which his brother accepts. His brother then reverses the pictures and the following day, Greg and Shari return to their normal bodies.
Against Shari's advice, Greg brings the camera to school and again insists to Mr. Saur to give him a passing mark for his assignment, offering to demonstrate the camera's powers. Mr. Saur takes the camera and insists on taking a picture of Greg with his entire class. He then snaps the photo. It is unknown what happens to Greg and the rest of the class at the end of the book.
Reprints and rereleases
| Book | Release date | Type | Media |
|---|---|---|---|
2003 - 2007 reprint series 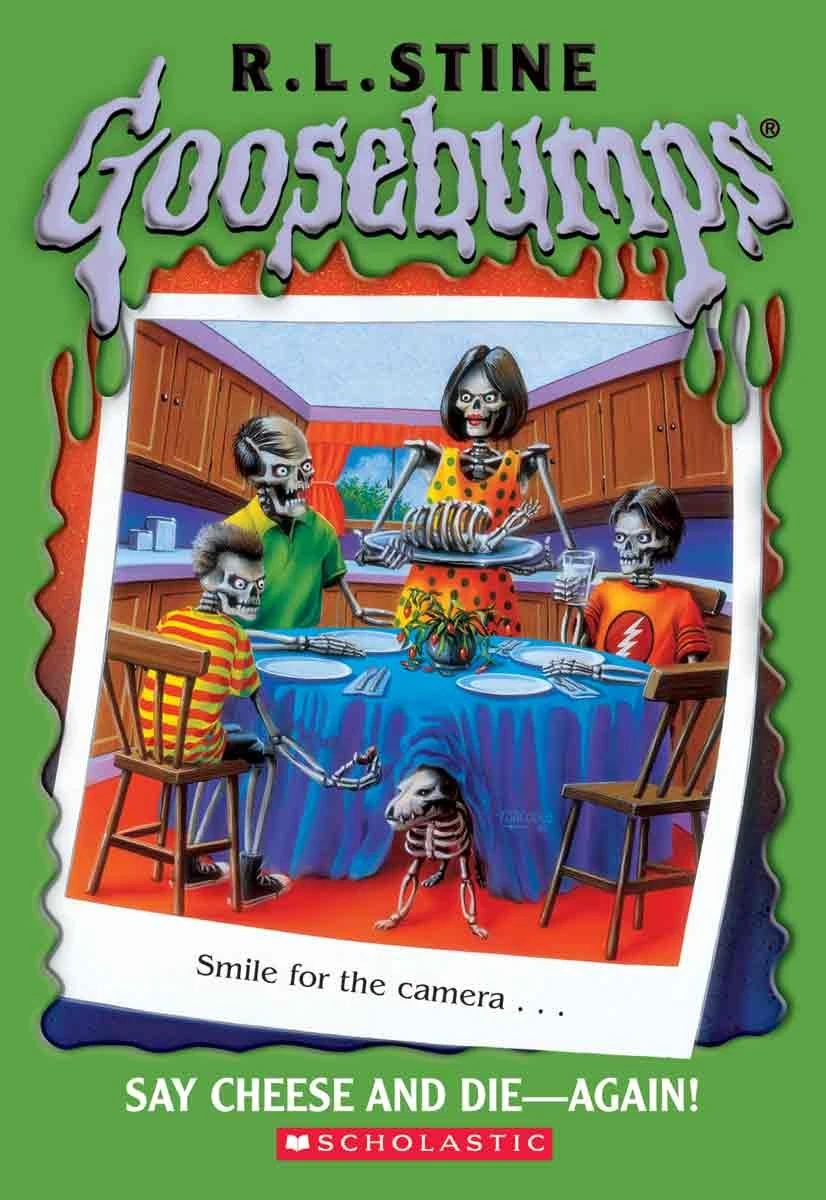 |
March 2004 | Standalone | Paperback |
Differences
- The tagline was changed to "Smile for the camera..."
International releases
| Gallery | |
|---|---|
") UK ") Italian (Foto Dal Futuro Vol. 2 - Photos From The Future No. 2) ") Spanish (La Otra Sonrisa de la Muerte - The Other Photos Of Death) ") German (Bitte Lächeln Please Smile!) ") Danish (Smil, du er Død Smile, You're Dead!) ") Swedish (Det Onda Ögat - Igen! - The Evil Eye - Again!) ") French (Ver. 1) (Photos De Malheur Pictures Of Misfortune) ") French (Ver. 2) (Photos De Malheur Pictures Of Misfortune) ") French (Ver. 3) (Photos De Malheur Pictures Of Misfortune) ") Brazilian (Sorria E Morra... Outra Vez! - Smile and Die... Again!) ") Mexican (Sonrie Y Muerte... Otra Vez! - Smile and Death... Again!) (Reprint) ") Italian (Compilation with Say Cheese and Die! and The Cuckoo Clock of Doom) | |
Merchandise
- Most of the 90s merch for Say Cheese and Die - Again! censored the word "Die". Mostly for apparel.
")
")
")
")
Television adaptation
Say Cheese and Die — Again! was adapted into an episode of the Goosebumps TV series. It is the eighteenth episode of season three, and the sixth-second episode overall.
")
Advertisement
")
Artwork
")
Tear-Outs
The original printings of the book included bookmark and trading card tear-outs.
")
Trivia
- Say Cheese and Die — Again! has the longest time difference between installments of any sequel in the original series at 3 years & 7 months, as well as by forty books.
- Unlike the previous book, Say Cheese and Die!, which was told in the third person narrative, Say Cheese and Die — Again! is told from Greg's point of view.
- It is never revealed what happened to the two bullies, Joey and Mickey, who found the camera and used it at the end of the previous book.
- Although Greg's age is not given in the previous book, the sequel indirectly reveals that he is 12 years old. Greg mentions that his 16-year-old brother, Terry, is four years older than he is.
- This is the final appearances of Greg and his friends to date.
- This is the last book in the Say Cheese and Die saga to be set in Pitts Landing.
- Greg claims the events of the first book happened last summer, even though it actually took place in the fall.
- One of the skeleton kids on the cover is wearing a shirt with a design closely resembling the logo for The Grateful Dead
- The 2018 eBook removes any mention of Greg referring to Donny and Brian as "Sumo-1 and Sumo-2".
- This is the final book to use "Coming Soon/Also Available From R.L. Stine" on the advertisement for the next book on the back cover.
References in other Goosebumps media
- In Goosebumps: The Game, there is an in-game achievement named "Say Cheese--Again!", which can be earned by taking pictures of all the monsters with the haunted camera.