No edit summary |
|||
| (30 intermediate revisions by 3 users not shown) | |||
| Line 2: | Line 2: | ||
There have been several different iterations of '''''Goosebumps'' trading cards'''. Some trading cards were features inside of books in the [[Goosebumps (original series)|original series]], but many sets were sold as separate promotional material. |
There have been several different iterations of '''''Goosebumps'' trading cards'''. Some trading cards were features inside of books in the [[Goosebumps (original series)|original series]], but many sets were sold as separate promotional material. |
||
| + | ==Trading Card Descriptions== |
||
| − | == Book trading cards == |
||
| + | === '''Book trading cards''' === |
||
| + | [[File:Goosebumps 42 Egg Monsters from Mars trading card front and back.jpg|thumb|230px]] |
||
| + | <p style="text-align:center;">''see full article: [[Goosebumps (original series)/Tear-outs]]''</p> |
||
| + | Starting with the fortieth book, ''[[Night of the Living Dummy III]]'', the original ''Goosebumps'' series started including trading cards in the middle of the books. There would be two cards with characters from that book and the following book, as well as a bookmark inside. These cards were only featured in the original series and were never officially released elsewhere. |
||
| − | <center>''see full article: [[Goosebumps (original series)/Tear-outs]]''</center> |
||
| + | === '''Topps Collectible Trading Cards''' === |
||
| − | [[File:2011-07-17 005.jpg|thumb|145x145px]] |
||
| + | [[File:Topps Trading Cards Series 1 Complete Set Box front.jpg|thumb|256x256px]] |
||
| − | Starting with #40 ''[[Night of the Living Dummy III]]'', the original ''Goosebumps'' series started including trading cards in the middle of the books. There would be two cards with characters from that book and the following book, as well as a bookmark inside. These cards were only featured in the original series and were never officially released elsewhere. |
||
| + | Topps released a series of trading cards in 1996. The cards came in the following varieties: |
||
| − | [[File:Download (15).jpg|thumb|256x256px]] |
||
| + | {| border="3" cellspacing="1" cellpadding="1" style="width:400px;" class="article-table" |
||
| − | == Topps Collectible Trading Cards == |
||
| + | |- |
||
| − | Topps had released many different Goosebumps trading cards as merchandise. Many of them were used as promotions. The trading cards would have different types of cards including: |
||
| + | ! scope="col"|Cards |
||
| − | * Rare Foil Embossed Cards |
||
| + | ! scope="col"|Number |
||
| − | * TV Show cards |
||
| + | ! scope="col"|Total |
||
| − | * Monster Cards |
||
| + | |- |
||
| − | * Story Cards |
||
| − | + | |Story Cards |
|
| + | |#1-36 |
||
| − | * Glow in the Dark Cards |
||
| + | |36 |
||
| − | * Foil Stickers. |
||
| + | |- |
||
| − | Topps released a series of trading cards in 1996. The cards came in the following varieties: TV Show cards, Monster Cards, Story cards, and Rare foil cards. The Monster Magic cards, Glow in the Dark cards, and Foil stickers were released in a separate box sets. Art for the Story cards were provided by Walter Velez, David Chelsea amd Wayne Murray. |
||
| + | |Puzzle Cards |
||
| + | |#37-45 |
||
| + | |9 |
||
| + | |- |
||
| + | |TV Cards |
||
| + | |#46-54 |
||
| + | |9 |
||
| + | |- |
||
| + | |Monster Magic Cards |
||
| + | |#M1-M6 |
||
| + | |6 |
||
| + | |- |
||
| + | |Glow-in-the-Dark Cards |
||
| + | |#G1-G6 |
||
| + | |6 |
||
| + | |- |
||
| + | |Foil Embossed Cards |
||
| + | |#1-6 |
||
| + | |6 |
||
| + | |- |
||
| + | |Foil Stickers |
||
| + | |#1-6 |
||
| + | |6 |
||
| + | |} |
||
| + | The Monster Magic cards, Glow in the Dark cards, and Foil stickers were the rare chase cards in the series and were heavily promoted on the packaging. Art for the cards were provided by Walter Velez, David Chelsea, Wayne Murray and Zina Saunders. The cards were sold in separate packs, along with complete card sets. The cards were also given away at Discovery Zone as part of a brief promotion. |
||
| − | A second series of the Topps set was in development and would have featured more story cards for books including ''[[Go Eat Worms!]]'', but the series was cancelled without any explanation. |
||
| + | Topps was in development of a second series of Goosebumps cards for a fall 1996 release and would have featured more story cards for books including ''[[Go Eat Worms!]]'', but the series was cancelled without any explanation. Only one promotional card was released. |
||
| − | == Gallery == |
||
| + | |||
| + | [[File:Glow in the Dark Trading Cards Promotional Sign.jpg|thumb|200px|Promotional Sign]] |
||
| + | ==='''Frito-Lay Glow-in-the-Dark Cards'''=== |
||
| + | Various packaging of Frito-Lay products included information for a mail-in offer to receive a total of eight Glow-in-the-Dark cards (not to be confused with the Topps Glow-in-the-Dark cards). When arranged correctly, the back of the eight cards formed a single image. |
||
| + | |||
| + | |||
| + | == Packaging and Promotional == |
||
<gallery> |
<gallery> |
||
| + | Topps Trading Cards Series 1 Complete Set Box front.jpg|Topps Complete Set 1-54 box (front) |
||
| − | Goosebumps-trading-cards-series1-pack.png|The packaging for the "Series One" line of ''Goosebumps'' trading cards. |
||
| + | Topps Complete Trading Cards Series One box back.jpg|Topps Complete Set 1-54 box (back) |
||
| − | TCpackage.jpg|Alternate packaging for the "Series One" line of ''Goosebumps'' trading cards. |
||
| − | Goosebumps-trading-cards- |
+ | Goosebumps-trading-cards-series1-pack.png|Topps "Series One" cards packaging |
| + | TCpackage.jpg|Alternate Topps "Series One" cards packaging |
||
| − | GBCardPromo.jpg|Promo card back for series one |
||
| + | Goosebumps-trading-cards-topps-boxed.jpg|An unopened package of Topps Goosebumps Collectible Trading Cards. |
||
| − | WormsCardBack.jpg|Promotional card advertising series 2 which never saw release. |
||
| + | Topps Trading Cards ad from Scream Newsletter Vol 2 No 4 Spring 1996.jpg|Ad from the Goosebumps Fan Club Newsletter, Spring 1996 |
||
| − | SlappyCardHolo.jpg|Slappy Promotional Hologram Card |
||
</gallery> |
</gallery> |
||
==Topps Card Gallery== |
==Topps Card Gallery== |
||
| − | === |
+ | ===Promotional=== |
| + | <gallery widths="232" position="center" columns="dynamic"> |
||
| + | SlappyCardHolo.jpg|Slappy Series One promotional card (front) |
||
| + | GBCardPromo.jpg|Slappy Series One promotional card (back) |
||
| + | WormsCard.jpg|[[Go Eat Worms!]] Promo card for unreleased series 2 (front) |
||
| + | WormsCardBack.jpg|Promo card for unreleased series 2 (back) |
||
| + | </gallery> |
||
| + | |||
| + | ===#1-36 Story Cards=== |
||
{| class="mw-collapsible mw-collapsed navtemplate console" |
{| class="mw-collapsible mw-collapsed navtemplate console" |
||
! colspan="2" style="background:green" |Gallery |
! colspan="2" style="background:green" |Gallery |
||
| Line 76: | Line 118: | ||
File:GBCard35.jpg|[[Be Careful What You Wish For...]]: All Alone! |
File:GBCard35.jpg|[[Be Careful What You Wish For...]]: All Alone! |
||
File:GBCard36.jpg|[[Be Careful What You Wish For...]]: Free as a Bird |
File:GBCard36.jpg|[[Be Careful What You Wish For...]]: Free as a Bird |
||
| − | File:WormsCard.jpg|[[Go Eat Worms!]]: Promo card for unreleased set |
||
</Gallery> |
</Gallery> |
||
|} |
|} |
||
| − | |||
| − | ====Puzzle Cards==== |
||
| − | <gallery> |
||
| − | File:MantisCard.jpg|Giant Praying Mantis |
||
| − | File:WerewolfCard.jpg|Werewolf of Fever Swamp |
||
| − | File:PhantomCard.jpg|The Phantom |
||
| − | File:SlappyCard.jpg|Slappy |
||
| − | File:MummyCard.jpg|The Mummy |
||
| − | File:CuddlesCard.jpg|Cuddles The Hamster |
||
| − | File:MudCard.jpg|Mud Monster |
||
| − | File:MaskCard.jpg|The Haunted Mask |
||
| − | File:BrewerCard.jpg|Plant Dad |
||
| − | CompletePuzzle.jpg|Completed Puzzle |
||
| − | </gallery> |
||
| − | |||
| − | ====TV Cards==== |
||
| − | <gallery> |
||
| − | File:TVCard01.jpg|Plant Dad |
||
| − | File:TVCard02.jpg|Cuckoo Bird |
||
| − | File:TVCard03.jpg|Carly Beth's Mask |
||
| − | File:TVCard04.jpg|Snake |
||
| − | File:TVCard05.jpg|Mummy |
||
| − | File:TVCard06.jpg|Mr. Mortman |
||
| − | File:TVCard07.jpg|Sabre |
||
| − | File:TVCard08.jpg|Grool |
||
| − | File:TVCard09.jpg|R.L Stine |
||
| − | </gallery> |
||
| − | |||
| − | ====Monster Magic==== |
||
| − | <gallery> |
||
| − | File:MM01.jpg|[[The Cuckoo Clock of Doom]] |
||
| − | File:MM02.jpg|[[The Haunted Mask (book)|The Haunted Mask]] |
||
| − | File:MM03.jpg|[[Monster Blood II]] |
||
| − | </gallery> |
||
====Card Backs==== |
====Card Backs==== |
||
| Line 152: | Line 159: | ||
File:GBBack31.jpg|[[The Haunted Mask (book)|The Haunted Mask]]: Terrifying Turnabout |
File:GBBack31.jpg|[[The Haunted Mask (book)|The Haunted Mask]]: Terrifying Turnabout |
||
File:GBBack32.jpg|[[The Haunted Mask (book)|The Haunted Mask]]: Stuck!... Forever? |
File:GBBack32.jpg|[[The Haunted Mask (book)|The Haunted Mask]]: Stuck!... Forever? |
||
| − | + | GBBack33.jpg|[[The Haunted Mask (book)|The Haunted Mask]]: Floating Faces of Fear |
|
File:GBBack34.jpg|[[Be Careful What You Wish For...]]: Wishful Thinking |
File:GBBack34.jpg|[[Be Careful What You Wish For...]]: Wishful Thinking |
||
File:GBBack35.jpg|[[Be Careful What You Wish For...]]: All Alone! |
File:GBBack35.jpg|[[Be Careful What You Wish For...]]: All Alone! |
||
File:GBBack36.jpg|[[Be Careful What You Wish For...]]: Free as a Bird |
File:GBBack36.jpg|[[Be Careful What You Wish For...]]: Free as a Bird |
||
| + | </gallery> |
||
| + | |} |
||
| + | |||
| + | ===#37-45 Puzzle Cards=== |
||
| + | <gallery> |
||
| + | File:MantisCard.jpg|[[Giant Praying Mantises|Giant Praying Mantis]] |
||
| + | File:WerewolfCard.jpg|[[Will Blake|Werewolf of Fever Swamp]] |
||
| + | File:PhantomCard.jpg|[[The Phantom]] |
||
| + | File:SlappyCard.jpg|[[Slappy the Dummy]] |
||
| + | File:MummyCard.jpg|[[Prince Khor-Ru|The Mummy]] |
||
| + | File:CuddlesCard.jpg|[[Cuddles the Hamster]] |
||
| + | File:MudCard.jpg|[[Mud Monsters]] |
||
| + | File:MaskCard.jpg|[[The Haunted Mask]] |
||
| + | File:BrewerCard.jpg|[[Dr. Brewer's Clone|Plant Dad]] |
||
| + | CompletePuzzle.jpg|Completed Puzzle |
||
| + | </gallery> |
||
| + | |||
| + | ====Card Backs==== |
||
| + | {| class="mw-collapsible mw-collapsed navtemplate console" |
||
| + | ! colspan="2" style="background:green" |Gallery |
||
| + | |- |
||
| + | | align="left" | |
||
| + | <gallery> |
||
File:GBBack37.jpg|Giant Praying Mantis |
File:GBBack37.jpg|Giant Praying Mantis |
||
File:GBBack38.jpg|Werewolf of Fever Swamp |
File:GBBack38.jpg|Werewolf of Fever Swamp |
||
| Line 165: | Line 195: | ||
File:GBBack44.jpg|The Haunted Mask |
File:GBBack44.jpg|The Haunted Mask |
||
File:GBBack45.jpg|Plant Dad |
File:GBBack45.jpg|Plant Dad |
||
| + | </gallery> |
||
| + | |} |
||
| + | |||
| + | ===#46-54 TV Cards=== |
||
| + | <gallery> |
||
| + | File:TVCard01.jpg|[[Dr. Brewer's Clone|Plant Dad]] |
||
| + | File:TVCard02.jpg|[[The Cuckoo Clock|Cuckoo Bird]] |
||
| + | File:TVCard03.jpg|[[The Haunted Mask|Carly Beth's Mask]] |
||
| + | File:TVCard04.jpg|Snake |
||
| + | File:TVCard05.jpg|[[Prince Khor-Ru|Mummy]] |
||
| + | File:TVCard06.jpg|[[Mr. Mortman]] |
||
| + | File:TVCard07.jpg|[[Sabre]] |
||
| + | File:TVCard08.jpg|[[Grool]] |
||
| + | File:TVCard09.jpg|[[R.L. Stine]] |
||
| + | </gallery> |
||
| + | |||
| + | ====Card Backs==== |
||
| + | {| class="mw-collapsible mw-collapsed navtemplate console" |
||
| + | ! colspan="2" style="background:green" |Gallery |
||
| + | |- |
||
| + | | align="left" | |
||
| + | <gallery> |
||
File:GBBack46.jpg|Plant Dad |
File:GBBack46.jpg|Plant Dad |
||
File:GBBack47.jpg|Cuckoo Bird |
File:GBBack47.jpg|Cuckoo Bird |
||
| Line 174: | Line 226: | ||
File:GBBack53.jpg|Grool |
File:GBBack53.jpg|Grool |
||
File:Checklist.jpg|Checklist |
File:Checklist.jpg|Checklist |
||
| − | File:MMBack01.jpg| |
||
| − | File:MMBack02.jpg| |
||
| − | File:MMBack03.jpg| |
||
</gallery> |
</gallery> |
||
|} |
|} |
||
| + | ===#M1-6 Monster Magic=== |
||
| − | ====Glow in the Dark Trading Cards==== |
||
| + | <gallery> |
||
| + | Monster Magic 1 Dead House trading card front.jpg|MM #1 [[Welcome to Dead House]] |
||
| + | Monster Magic 2 Lets Get Invisible trading card front.jpg|MM #2 [[Let's Get Invisible!]] |
||
| + | File:MM02.jpg|MM #3 [[The Haunted Mask (book)|The Haunted Mask]] |
||
| + | File:MM03.jpg|MM #4 [[Monster Blood II]] |
||
| + | MM01.jpg|MM #5 [[The Cuckoo Clock of Doom]] |
||
| + | Monster Magic 6 Return Mummy trading card front.jpg|MM #6 [[Return of the Mummy]] |
||
| + | </gallery> |
||
| + | |||
| + | ====Card Backs==== |
||
| + | {| class="mw-collapsible mw-collapsed navtemplate console" |
||
| + | ! colspan="2" style="background:green" |Gallery |
||
| + | |- |
||
| + | | align="left" | |
||
| + | <gallery> |
||
| + | Monster Magic 1 Dead House trading card back.jpg|MM #1 [[Welcome to Dead House]] |
||
| + | Monster Magic 2 Lets Get Invisible trading card back.jpg|MM #2 [[Let's Get Invisible!]] |
||
| + | File:MMBack02.jpg|MM #3 [[The Haunted Mask (book)|The Haunted Mask]] |
||
| + | File:MMBack03.jpg|MM #4 [[Monster Blood II]] |
||
| + | File:MMBack01.jpg|MM #5 [[The Cuckoo Clock of Doom]] |
||
| + | Monster Magic 6 Return Mummy trading card back.jpg|MM #6 [[Return of the Mummy]] |
||
| + | </gallery> |
||
| + | |} |
||
| + | |||
| + | ===#G1-6 Glow-in-the-Dark Cards=== |
||
| + | <gallery> |
||
| + | 05 Mummy Glow in Dark Topps Trading Card.jpg|G1 #5 [[The Curse of the Mummy's Tomb]] |
||
| + | 07 Slappy Glow Dark Topps Trading Card.jpg|G3 #7 [[Night of the Living Dummy]] |
||
| + | 09 Camp Nightmare Glow Dark Topps Trading Card.jpg|G2 #9 [[Welcome to Camp Nightmare]] |
||
| + | 16 Horrorland Glow Dark Topps Trading Card.jpg|G4 #16 [[One Day at HorrorLand]] |
||
| + | 22 Ghost Beach Glow in Dark Topps Trading Card.jpg|G5 #22 [[Ghost Beach]] |
||
| + | 32 Barking Ghost Glow Dark Topps Trading Card.jpg|G6 #32 [[The Barking Ghost]] |
||
| + | </gallery> |
||
| + | |||
| + | ====Card Backs==== |
||
| + | {| class="mw-collapsible mw-collapsed navtemplate console" |
||
| + | ! colspan="2" style="background:green" |Gallery |
||
| + | |- |
||
| + | | align="left" | |
||
| + | <gallery> |
||
| + | 05 Mummy Glow in Dark Topps Trading Card G1 back.jpg|G1 #5 [[The Curse of the Mummy's Tomb]] |
||
| + | 07 Slappy Glow Dark Topps Trading Card G3 back.jpg|G3 #7 [[Night of the Living Dummy]] |
||
| + | 09 Camp Nightmare Glow Dark Topps Trading Card G2 back.jpg|G2 #9 [[Welcome to Camp Nightmare]] |
||
| + | 22 Ghost Beach Glow in Dark Topps Trading Card G5 back.jpg|G5 #22 [[Ghost Beach]] |
||
| + | 32 Barking Ghost Glow Dark Topps Trading Card G6 back.jpg|G6 #32 [[The Barking Ghost]] |
||
| + | </gallery> |
||
| + | |} |
||
| + | |||
| + | ===#1-6 Foil Stickers=== |
||
| + | <gallery> |
||
| + | 1 Mud Monster Topps Foil Sticker.jpg|#1 Mud Monster |
||
| + | 2 Slappy Topps Foil Sticker.jpg|#2 Slappy |
||
| + | 3 Curly Topps Foil Sticker.jpg|#3 Curly |
||
| + | 4 Cuddles Topps Foil Sticker.jpg|#4 Cuddles |
||
| + | 5 Prince Khor-Ru Topps Foil Sticker.jpg|#5 Prince Khor-Ru |
||
| + | 6 Horror Topps Foil Sticker.jpg|#6 The Horror |
||
| + | </gallery> |
||
| + | |||
| + | ====Card Backs==== |
||
| + | {| class="mw-collapsible mw-collapsed navtemplate console" |
||
| + | ! colspan="2" style="background:green" |Gallery |
||
| + | |- |
||
| + | | align="left" | |
||
| + | <gallery> |
||
| + | Topps Foil Sticker 1 back.jpg|#1 |
||
| + | Topps Foil Sticker 2 back.jpg|#2 |
||
| + | Topps Foil Sticker 3 back.jpg|#3 |
||
| + | Topps Foil Sticker 4 back.jpg|#4 |
||
| + | Topps Foil Sticker 5 back.jpg|#5 |
||
| + | Topps Foil Sticker 6 back.jpg|#6 |
||
| + | </gallery> |
||
| + | |} |
||
| + | |||
| + | ==Frito-Lay Glow in the Dark Trading Cards== |
||
<gallery spacing="small" widths="151"> |
<gallery spacing="small" widths="151"> |
||
slappy-tradingcard-glowinthedark.png|Slappy (#1) |
slappy-tradingcard-glowinthedark.png|Slappy (#1) |
||
| Line 190: | Line 313: | ||
dontmakemelaugh-tradingcard-glowinthedark.png|"The Hand" (#7) |
dontmakemelaugh-tradingcard-glowinthedark.png|"The Hand" (#7) |
||
goosebumps glow in the dark trading card check list.png|"The Checklist" (#8) |
goosebumps glow in the dark trading card check list.png|"The Checklist" (#8) |
||
| − | + | slappy-tradingcard-glowinthedark-back.png|Slappy (#1) back |
|
| − | + | mummy-tradingcard-glowinthedark-back.png|Prince Khor-Ru (#2) back |
|
| − | + | cuddles-tradingcard-glowinthedark-back.png|Cuddles (#3) back |
|
| − | + | horror-tradingcard-glowinthedark-back.png|The Horror (#4) back |
|
| − | + | mudmonster-tradingcard-glowinthedark-back.png|Mud Monster (#5) back |
|
| − | + | curly-tradingcard-glowinthedark-back.png|Curly (#6) back |
|
| − | dontmakemelaugh-tradingcard-glowinthedark-back.png| |
+ | dontmakemelaugh-tradingcard-glowinthedark-back.png|"The Hand" (#7) back |
| − | goosebumps glow in the dark trading card check list back.png| |
+ | goosebumps glow in the dark trading card check list back.png|"The Checklist" (#8) |
goosebumps glow in the dark trading cards complete set.png|All the glow in the dark trading cards put together. |
goosebumps glow in the dark trading cards complete set.png|All the glow in the dark trading cards put together. |
||
| + | Glow in the Dark Trading Cards Promotional Sign.jpg|Promotional Sign |
||
| + | Doritos bag with glow-in-the-dark Goosebumps trading cards 1994.jpg|Doritos bag with Mail-In offer for Glow-in-the-Dark trading cards |
||
</gallery> |
</gallery> |
||
| − | + | ==Original Series Tear-out Trading Cards== |
|
<gallery> |
<gallery> |
||
Goosebumps_40_Night_Living_Dummy_III_trading_card_front_and_back.jpg|#40 [[Night of the Living Dummy III]] |
Goosebumps_40_Night_Living_Dummy_III_trading_card_front_and_back.jpg|#40 [[Night of the Living Dummy III]] |
||
| Line 207: | Line 332: | ||
Goosebumps 42 Egg Monsters from Mars trading card front and back.jpg|#42 [[Egg Monsters from Mars]] |
Goosebumps 42 Egg Monsters from Mars trading card front and back.jpg|#42 [[Egg Monsters from Mars]] |
||
Goosebumps 43 Beast from the East trading card front and back.jpg|#43 [[The Beast from the East]] |
Goosebumps 43 Beast from the East trading card front and back.jpg|#43 [[The Beast from the East]] |
||
| − | + | Goosebumps 44 Say Cheese and Die Again trading card front and back.jpg|#44 [[Say Cheese and Die — Again!]] |
|
| + | Goosebumps 45 Ghost Camp trading card front and back.jpg|#45 [[Ghost Camp]] |
||
| + | Goosebumps 46 How to Kill a Monster trading card front and back.jpg|#46 [[How to Kill a Monster]] |
||
| + | Goosebumps 47 Legend of Lost Legend trading card front and back.jpg|#47 [[Legend of the Lost Legend]] |
||
Goosebumps 48 Attack Jack O Lanterns trading card front and back.jpg|#48 [[Attack of the Jack-O'-Lanterns]] |
Goosebumps 48 Attack Jack O Lanterns trading card front and back.jpg|#48 [[Attack of the Jack-O'-Lanterns]] |
||
Goosebumps 49 Vampire Breath trading card front and back.jpg|#49 [[Vampire Breath]] |
Goosebumps 49 Vampire Breath trading card front and back.jpg|#49 [[Vampire Breath]] |
||
| + | Goosebumps 50 Calling All Creeps trading card front and back.jpg|#50 [[Calling All Creeps!]] |
||
Goosebumps 51 Beware the Snowman trading card front and back.jpg|#51 [[Beware, the Snowman]] |
Goosebumps 51 Beware the Snowman trading card front and back.jpg|#51 [[Beware, the Snowman]] |
||
Goosebumps 52 How I Learned to Fly trading card front and back.jpg|#52 [[How I Learned to Fly]] |
Goosebumps 52 How I Learned to Fly trading card front and back.jpg|#52 [[How I Learned to Fly]] |
||
| Line 217: | Line 346: | ||
Goosebumps 56 Curse Camp Cold Lake trading card front and back.jpg|#56 [[The Curse of Camp Cold Lake]] |
Goosebumps 56 Curse Camp Cold Lake trading card front and back.jpg|#56 [[The Curse of Camp Cold Lake]] |
||
Goosebumps 57 Best Friend is Invisible trading card front and back.jpg|#57 [[My Best Friend Is Invisible]] |
Goosebumps 57 Best Friend is Invisible trading card front and back.jpg|#57 [[My Best Friend Is Invisible]] |
||
| + | Goosebumps 58 Deep Trouble II trading card front and back.jpg|#58 [[Deep Trouble II]] |
||
| + | Goosebumps 59 Haunted School trading card front and back.jpg|#59 [[The Haunted School]] |
||
Goosebumps_62_Monster_Blood_IV_trading_card_front_and_back.jpg|#62 [[Monster Blood IV]] |
Goosebumps_62_Monster_Blood_IV_trading_card_front_and_back.jpg|#62 [[Monster Blood IV]] |
||
| + | Goosebumps 2000 01 Cry of the Cat trading card front and back.jpg|Series 2000 #1 [[Cry of the Cat]] |
||
| + | Goosebumps tear-outs (multiple).jpg|Cards for many Goosebumps books |
||
| + | </gallery> |
||
| + | |||
| + | ==Fox Kids Magazine trading cards== |
||
| + | Most issues of Fox Kids Magazine included a set of four trading cards for a current popular franchise. The Autumn 1997 issue included four Goosebumps trading cards based on the Goosebumps TV show airing on Fox Kids Network. |
||
| + | <gallery position="center"> |
||
| + | Goosebumps TV trading cards front TotallyKids Mag Autumn 1997.jpg|4 trading cards (front) |
||
| + | Goosebumps TV trading cards back TotallyKids Mag Autumn 1997.jpg|4 trading cards (back) |
||
</gallery> |
</gallery> |
||
[[Category:Merchandise]] |
[[Category:Merchandise]] |
||
| Line 223: | Line 363: | ||
[[Category:Original series]] |
[[Category:Original series]] |
||
[[Category:Slappy]] |
[[Category:Slappy]] |
||
| + | [[Category:Monsters]] |
||
Revision as of 06:01, 31 January 2020

There have been several different iterations of Goosebumps trading cards. Some trading cards were features inside of books in the original series, but many sets were sold as separate promotional material.
Trading Card Descriptions
Book trading cards
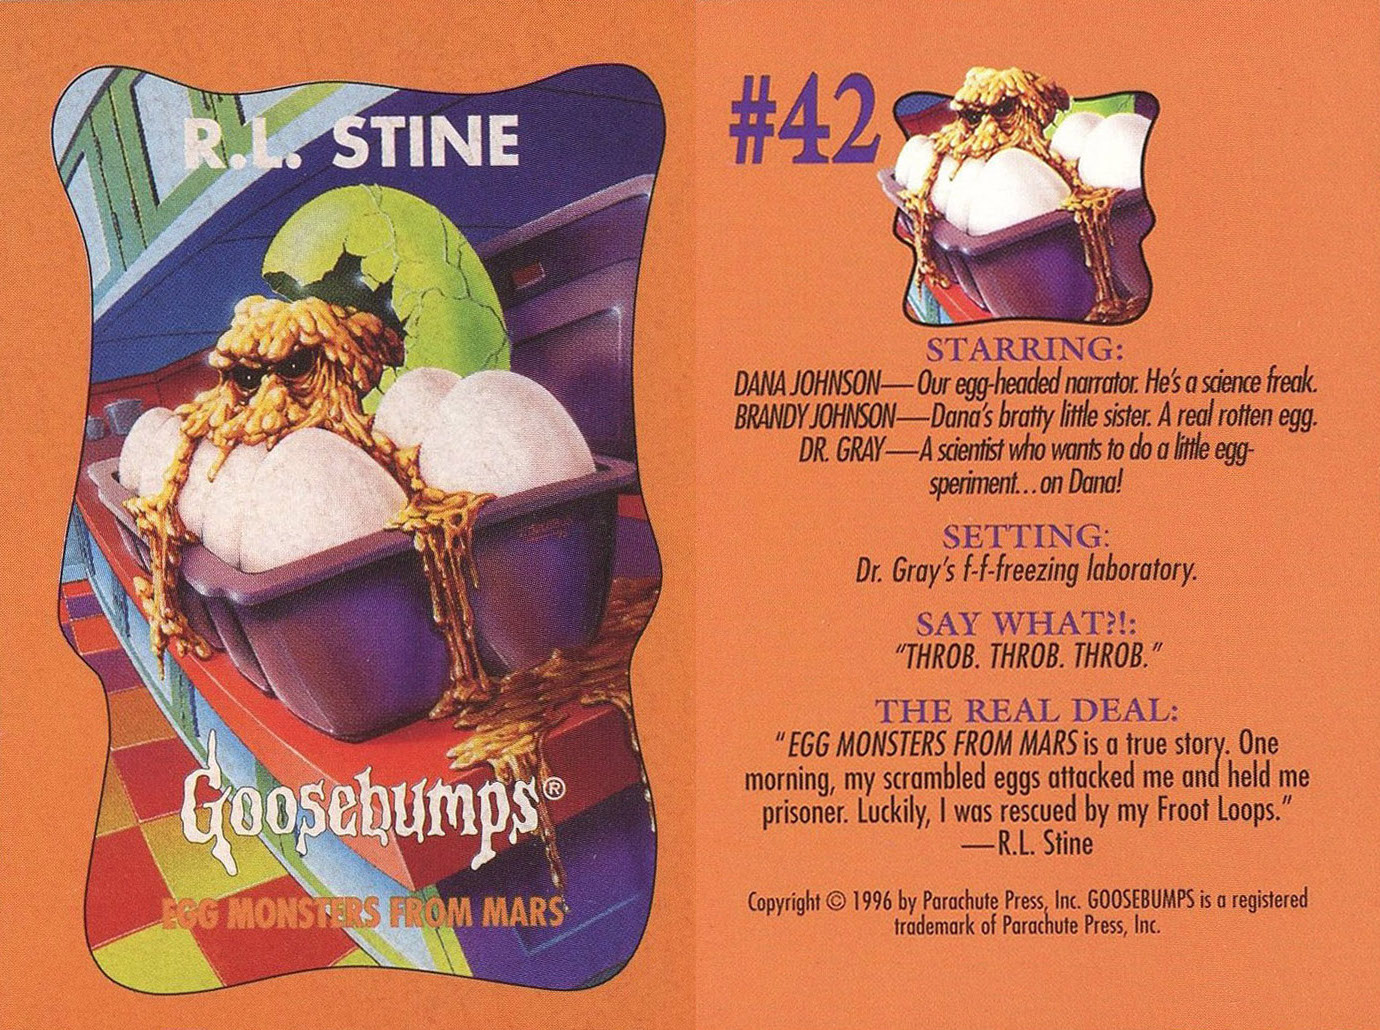

see full article: Goosebumps (original series)/Tear-outs
Starting with the fortieth book, Night of the Living Dummy III, the original Goosebumps series started including trading cards in the middle of the books. There would be two cards with characters from that book and the following book, as well as a bookmark inside. These cards were only featured in the original series and were never officially released elsewhere.
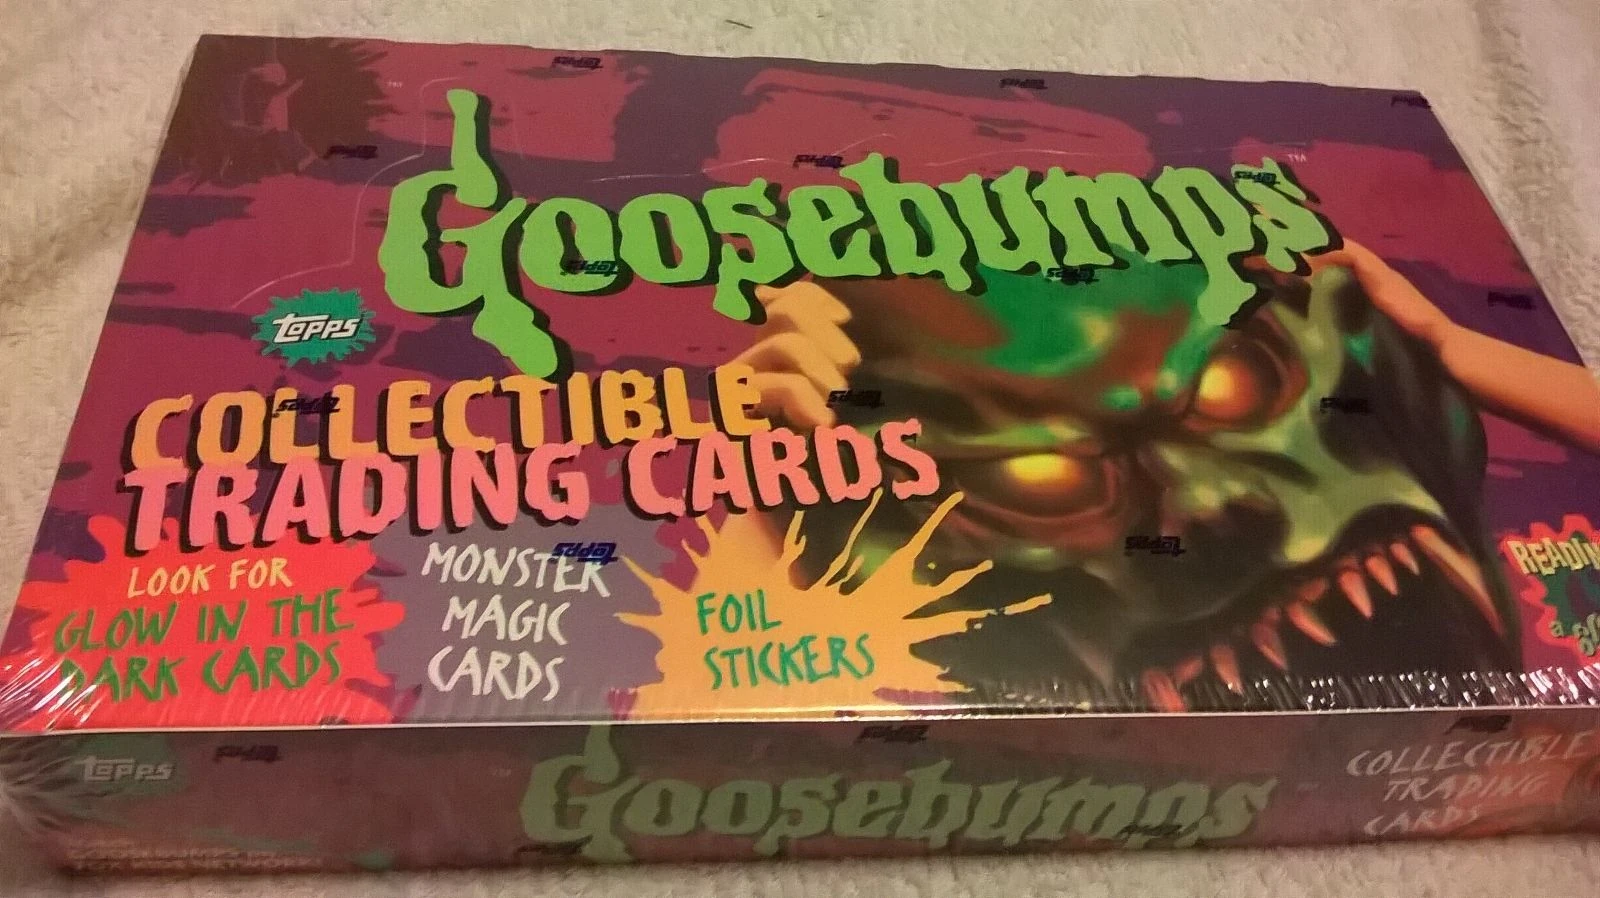
Topps Collectible Trading Cards

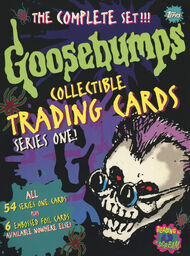
Topps released a series of trading cards in 1996. The cards came in the following varieties:
| Cards | Number | Total |
|---|---|---|
| Story Cards | #1-36 | 36 |
| Puzzle Cards | #37-45 | 9 |
| TV Cards | #46-54 | 9 |
| Monster Magic Cards | #M1-M6 | 6 |
| Glow-in-the-Dark Cards | #G1-G6 | 6 |
| Foil Embossed Cards | #1-6 | 6 |
| Foil Stickers | #1-6 | 6 |
The Monster Magic cards, Glow in the Dark cards, and Foil stickers were the rare chase cards in the series and were heavily promoted on the packaging. Art for the cards were provided by Walter Velez, David Chelsea, Wayne Murray and Zina Saunders. The cards were sold in separate packs, along with complete card sets. The cards were also given away at Discovery Zone as part of a brief promotion.
Topps was in development of a second series of Goosebumps cards for a fall 1996 release and would have featured more story cards for books including Go Eat Worms!, but the series was cancelled without any explanation. Only one promotional card was released.

Promotional Sign
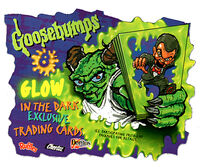
Frito-Lay Glow-in-the-Dark Cards
Various packaging of Frito-Lay products included information for a mail-in offer to receive a total of eight Glow-in-the-Dark cards (not to be confused with the Topps Glow-in-the-Dark cards). When arranged correctly, the back of the eight cards formed a single image.
Packaging and Promotional
")
")
")
")
")
")
Topps Card Gallery
Promotional
")
")
")
")
#1-36 Story Cards
")
")
")
")
")
")
")
")
")
")
")
")
")
")
")
")
")
")
")
")
")
")
")
")
")
")
")
")
")
")
")
")
")
")
")
")
Card Backs
")
")
")
")
")
")
")
")
")
")
")
")
")
")
")
")
")
")
")
")
")
")
")
")
")
")
")
")
")
")
")
")
")
")
")
#37-45 Puzzle Cards
")
")
")
")
")
")
")
")
")
")
Card Backs
| Gallery | |
|---|---|
") Giant Praying Mantis ") Werewolf of Fever Swamp ") The Phantom ") Slappy ") The Mummy ") Cuddles The Hamster ") Mud Monster ") The Haunted Mask ") Plant Dad | |
#46-54 TV Cards
")
")
")
")
")
")
")
")
")
Card Backs
| Gallery | |
|---|---|
") Plant Dad ") Cuckoo Bird ") Carly Beth's Mask ") Snake ") Mummy ") Mr. Mortman ") Sabre ") Grool ") Checklist | |
#M1-6 Monster Magic
")
")
")
")
")
")
Card Backs
| Gallery | |
|---|---|
") MM #1 Welcome to Dead House ") MM #2 Let's Get Invisible! ") MM #3 The Haunted Mask ") MM #4 Monster Blood II ") MM #5 The Cuckoo Clock of Doom ") MM #6 Return of the Mummy | |
#G1-6 Glow-in-the-Dark Cards
")
")
")
")
")
")
Card Backs
| Gallery | |
|---|---|
") G5 #22 Ghost Beach ") G6 #32 The Barking Ghost | |
")
")
")
#1-6 Foil Stickers
")
")
")
")
")
")
Card Backs
| Gallery | |
|---|---|
") #1 ") #2 ") #3 ") #4 ") #5 ") #6 | |
Frito-Lay Glow in the Dark Trading Cards
")
")
")
")
")
")
")
")
")
")
")
")
")
")
")
")
")
")
")
Original Series Tear-out Trading Cards
")
")
")
")
")
")
")
")
")
")
")
")
")
")
")
")
")
")
")
")
")
")
.jpg "Goosebumps tear-outs (multiple).jpg (94 KB)")
Fox Kids Magazine trading cards
Most issues of Fox Kids Magazine included a set of four trading cards for a current popular franchise. The Autumn 1997 issue included four Goosebumps trading cards based on the Goosebumps TV show airing on Fox Kids Network.
")
")